
A while ago I produced a walk-through on how to adjust the valve clearance on the FTO’s V6 MIVEC engine. While I was generally happy with what was covered, one thing was missing, which was servicing the twelve hydraulic tappets found in this engine that are part of Mitsubishi’s MIVEC .
To some it might be surprising to hear this engine has hydraulic tappets, people generally focus on the 24 fixed tappets as they’re the ones that often need adjusting, but it’s possible that that tap-tap-tap is a stuck MIVEC tappet, or the oil ways to it are being blocked, and I’d like to show you how easy it is to clean them.
To start you need to get the rocker covers off, and you can follow the valve clearance guide to do this. Once you’ve got them off, it should look something like this:
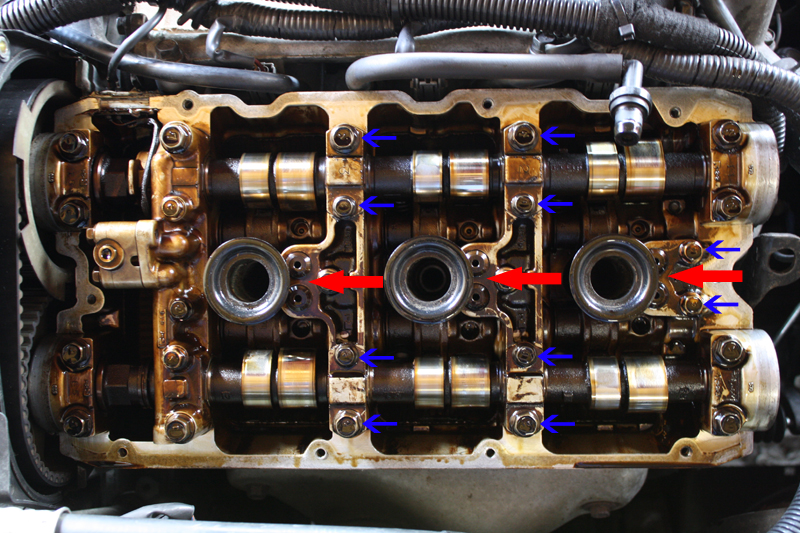
Firstly you can see the top of the hydraulic tappets to the left of the red arrows, they’re the little round things with a hole in the top, I’m sure there’s a more technical name like input shaft flange coupling for them, but there they are. If you want to, you can carefully screw a wood screw into the little hole and pull it up, which is a good way of seeing if it’s jammed up or not. You should be able to gently pull it up a little and then let it pull itself back down.
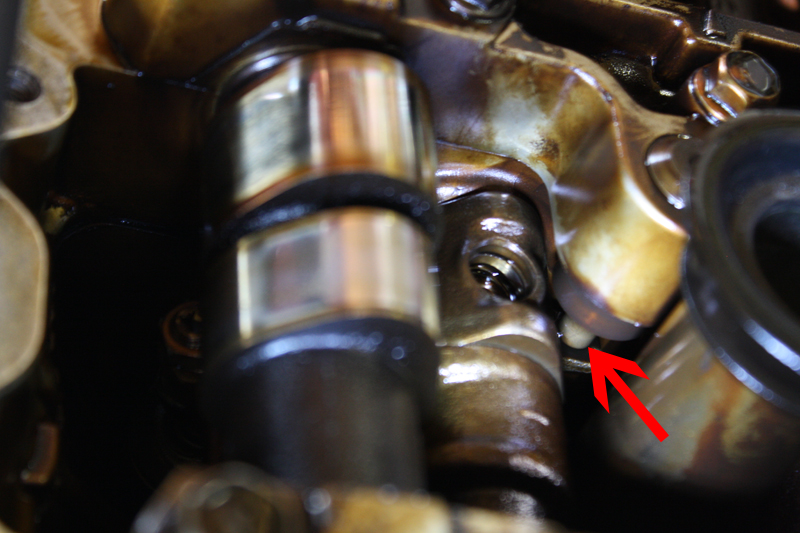
In the above picture we can see the bottom of the tappet, which rests against a tab coming off what’s called the MIVEC follower. I’m not going to pretend I know exactly how MIVEC works, although I probably should, but my brain is fried from spending the last three days researching how Hyper Threading works.
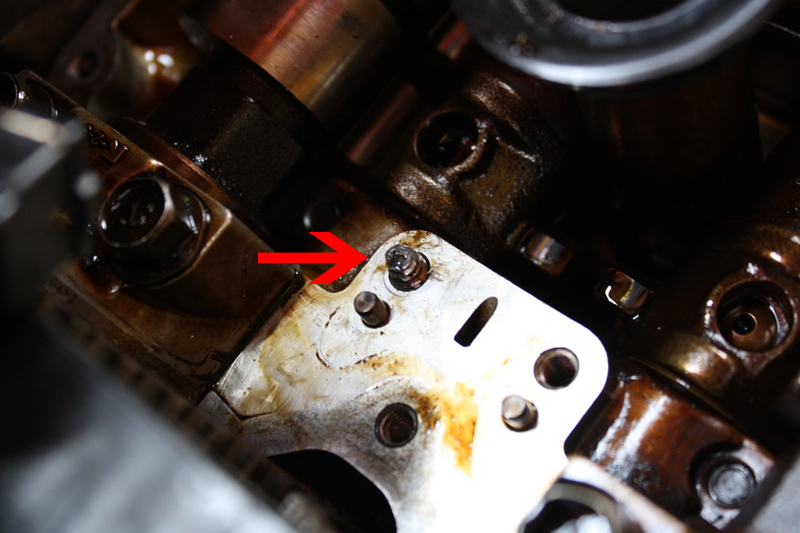
What I can tell you is that cleaning these is a good idea, and to do this you have to remove the cam caps holding them. If you look at the previous picture, you’ll see blue arrows pointing to the bolts holding the cam caps in place. Remove one cam cap at a time, and put it somewhere clean to work on:
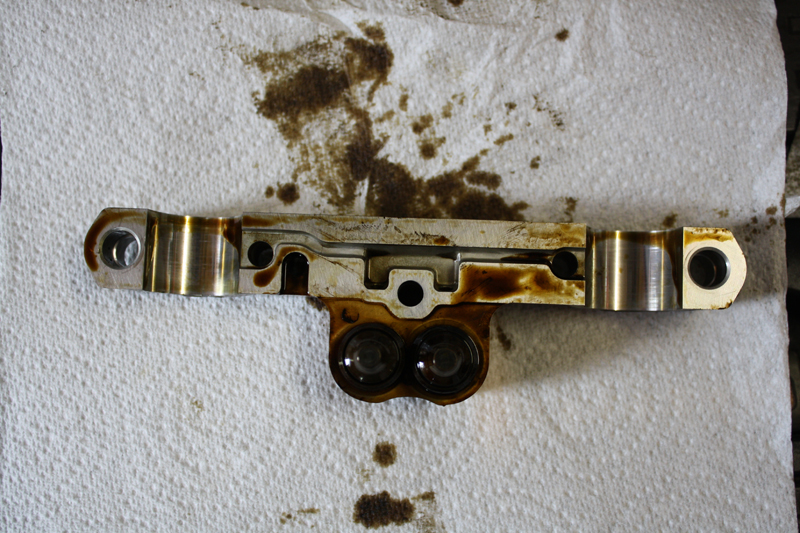
In the above picture you can see the bottom of the hydraulic tappets, and also the oil ways inlaid in to the underside of the cam cap that feeds the tappets with oil. Removing the tappets is very easy, they just slide out.

In this picture you can see the tappets removed. First we’ll take a look at the oil ways and give them a clean, and then move on to the tappets.
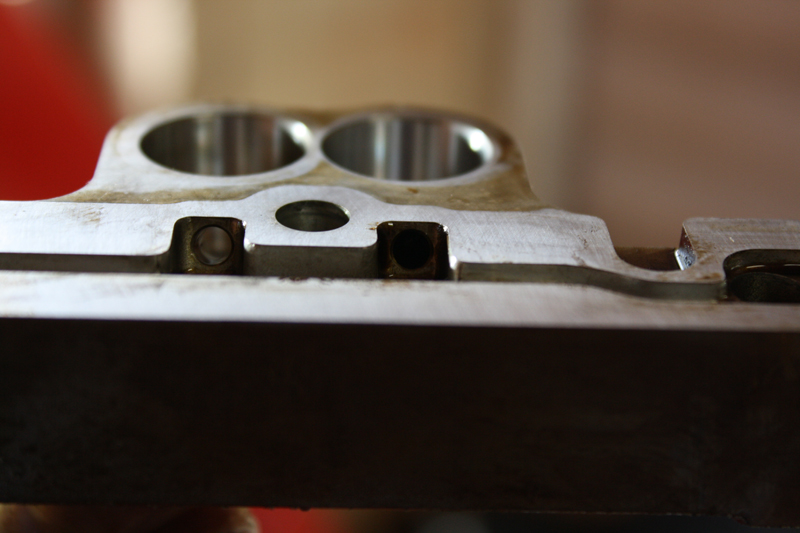 You can see one of the holes feeding a tappet with oil is blocked, in fact this one had a small piece of what I assume is some kind of sealant lodged in it. A quick clean and all is good, just make sure you don’t damage the flat mating surfaces. Now we’ll tackle the tappets.
If you hold a tappet between your thumb and forefinger, you should be able to squeeze it a bit, how much depends on how strong you are, and how sludged up the tappet is. Watch out when you do this, as oil will squirt out of the little hole in the side. What we want to do is flush the inside of the tappet repeatedly with carb or brake cleaner, until it can be squeezed with less force or all the gunk has come out.
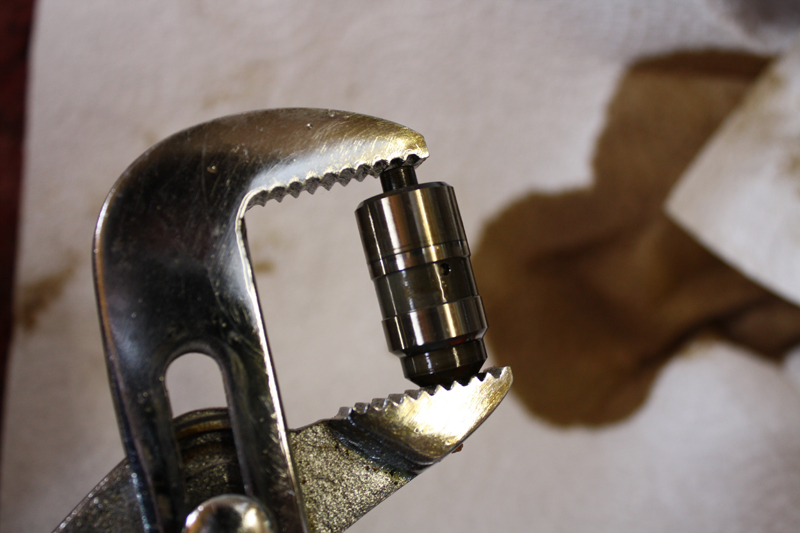
This is how I squeezed my tappets using a pair of pliers, I squirted cleaner in to the little hole, and then pumped the tappet until all the gunk came out. Rinse and repeat until squeaky clean. I have to say at this point, I think i should have inserted something soft between the pliers and tappets. There was no scoring or marks on the tappet from doing this, but you may feel more comfortable using some card or similar to protect the tappet.
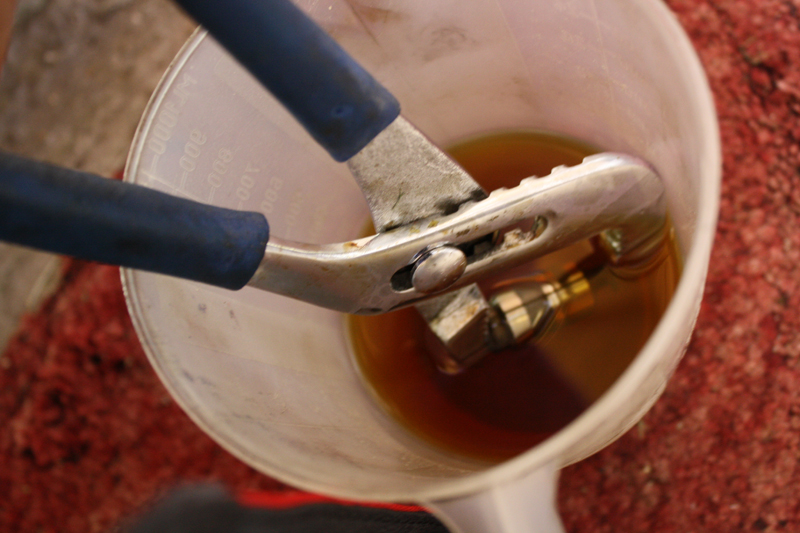
Once you’re happy with how clean everything is, flush the tappet through with clean fresh oil by pumping it, and then prime the tappet by ensuring it’s filled with oil before fitting it back in to the cam cap. When you fit the cam cap back on, I thought it was a good idea to put a little oil on the areas that mate with the camshaft, so it’s not running without some lubrication.
A word of warning about replacing the cam caps, the cam cap on the far right is smaller than the other two. When I was refitting this one, and nipping up the bolt before being torqued correctly, I accidentally snapped one of its bolts.
Thankfully because it wasn’t driven fully home, it was fairly easy to remove using mole grips, but it was a scary half hour while I agonised over the best way to safely remove it.
After this I realised that because of the position of the engine in it’s cycle, when I went to refit this smaller cap and tighten the bolts up, I was having to compress the tappets too. This confused my ability to feel when I had fully tightened the bolt, to the point where after a while I was just stretching the bolt. The solution was to turn the engine over so that the cams were in a position where these particular tappets, were not under compression. I then torqued the bolts to the correct setting.


Great guide, i’m going to do mine in a few weeks using this, thank you.
Thanks Rob, much appreciated, if you need any pointers while you’re doing it, feel free to send me a message and I’ll try to help out.
think my fto has similar top end intermittent rattles. yr info was excellent thanks…will start to strip n repair on thurs .
do you have a link to the correct torque settings?